I have had my studio monitors buzz, crackle, pop, hiss, and just about any other type of noise and interference you can think of. I decided to tackle the problem once and for all to figure out every factor that could cause my studio monitors to have noise and interference.
(I even compiled a step-by-step checklist for troubleshooting noise and interference for your studio monitors, which you can find below).
Cracks, buzzes, pops, and other noise interference from your studio monitors could be caused by various factors, including: monitor features, materials, or components, as well as cables, ground loops, other audio devices, other household AC devices, and possibly user neglect regarding some of these factors.
In this article, we will do a brief overview of studio monitors, and then we will jump into the 13 reasons why your monitors could be riddled with noise and interference.
Some of these reasons are not so common, so be sure to take notes, and then once you have a firm grasp of everything, be sure to check out our step-by-step how-to guide for checking studio monitor noise and interference.
Let’s get started.
Studio Monitors Overview
Studio monitors are specifically designed loudspeakers that are different from your normal home entertainment speakers or bookshelf speakers.
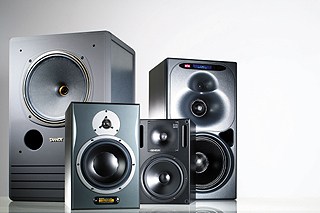
Studio monitors are designed with several key features:
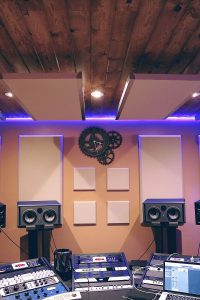
- they are near or medium-field speakers (this means the listening sweet spot is relatively close to the monitors).
- they are designed with a flat response (this means that no boost or cut has been given to any frequency)
- they are designed for absolute critical listening (this makes them ideal for referencing audio, mixing, or mastering).
Many factors come into play that can cause your studio monitors to give off all sorts of interference. Some may apply to your situation, and some may not.
Remember that there are usually common underlying problems in any situation, and then there are rare problems that you don’t come across very often.

You might need to walk through the checklist at the end of this article to help you troubleshoot the problem. Take your time to go through each factor from beginning to end to find and solve the root cause of why your monitors are riddled with interference and noise.
| Cause | Notes |
|---|---|
| Studio Monitor Features (such as Bluetooth) | A Faraday cage will block out signals sent by an electronic device. |
| Studio Monitor Components (such as powered amplifiers) | Consider a passive studio monitor (which does not have a built-in amplifier) along with a high-quality standalone amplifier. |
| Stacking Studio Monitors | Stacking can cause interference, so consider using stands. |
| Unbalanced Cables | Speaker wires, TS cables, & RCA cables are unbalanced, as are some auxiliary cables. These are susceptible to a lot of noise. Consider using balanced cables (like XLR or TRS). |
| Cable Length | Even balanced cables may have audio issues if they are run too long. |
| USB Cables | These could be leaking current & causing noise. Consider a high-quality cable and a ferrite noise suppressor. Or, make an electrical shunt. |
| Ground Loops (Wiring) | This happens when connected audio equipment is plugged into different electrical outlets. Try plugging in to just one outlet (use a surge protector or power strip to give you more plugins). |
| AC Devices | Other devices (vacuum, hairdryer, microwave, blender, etc.) can cause AC interference. Turn off or unplug these devices and try again! |
| Phone/ Laptop/ Computer | The motherboard, fans, or other components can cause noise. Consider a metal case (Faraday cage) for your computer to shield it. |
| DAW Interference | Unlikely, but check your settings. |
| Plugin Interference | Check for any effects that could cause a problem. |
| Other Audio Equipment Interference | Audio interfaces and other devices could cause a problem. |
| User Neglect | Make sure none of your equipment, cables, etc. are damaged. Check connections. |
of noises (crackles, pops, buzzes, hissing) in your
studio monitors, along with how you can try to fix it.
Let’s get into more detail about why studio monitors can be susceptible to noise, cracks, pops, hisses, and other audio issues.
Studio Monitor Features
Studio monitors (especially modern monitors) can come with an array of features. Some of these features include:
- Bluetooth connectivity
- LED graphic equalizers
- Room compensation
Some other features are not specifically related to the monitor’s sound aspect, but rather their design. For example, monitors could be designed to be big and heavy or light and compact. They could be made of wood, plastic, or a combination of the two.
Manufacturers spend thousands of hours in R&D (research and development) trying to design, implement, and build the best studio monitors out there. Needless to say, in their pursuit of perfection, there are definitely problems that arise.
Sometimes manufacturers don’t do their due diligence in testing and ensuring all aspects of their studio monitors are perfect before release. Hence, you may sometimes find that if you turn on the Bluetooth functionality, you may hear some noise.
Usually, you would need a Faraday cage (read my article here on detailed audio interference here) to block out all signals that an electronic device sends; however, it is not possible to build and structure every studio monitor this way.
We could not find any specific studio monitors to point out that are faulty in this way. However, be sure to check every aspect and feature of your studio monitors before purchasing them, especially if you are getting started on a budget and have to settle for an entry-level pair of monitors.
Studio Monitor Components
Studio monitors are not just loudspeakers. They have specific components built into them.
These components are usually made with the highest quality materials to make your studio monitors as perfect to true sound quality as they can be.
Some components that make up a studio monitor include:
- powered amplifiers (if the studio monitors are active)
- transducers
- foam
- wiring
(You can read more about active and passive studio monitors in my article – here).
Depending on the materials used, where they placed the monitors’ components, how likely the components are to cause interference and noise, and a few other aspects of the components can cause severe interference and noise when the monitors are being used.
Manufacturers spend lots of time and money on designing, implementing, and developing high-quality monitors. Still, as we said, they can’t get it all right all the time for all possible use scenarios (especially in their entry-level monitors).
(By the way, be sure to read my article where I review some of the best studio monitors – here).
Watch recordingrevolution give you 3 tips for choosing studio monitors.
Stacking Studio Monitors
Needless to say, studio monitors were never meant to be stacked on top of one another. Due to the nature of their design, the materials they are made from, and the components that make up the monitors, having them stacked on top of one another can definitely cause noise and interference.
Read my article on stacking studio monitors and why you shouldn’t – here.
(You might consider using studio monitor stands instead – you can learn more here).
Unbalanced vs Balanced Cables
One of the main reasons studio monitors could produce lots of interference or noise is your cabling situation. The factors that come into play with cables, the different types, and how they are designed will definitely play a role in less noise and interference.
(If you are just starting to get set up, you can learn about the cables you need for studio monitors here.)
Here is a quick overview of cables so you can decipher whether or not they could be the cause of your interference or noise.
Unbalanced Cables
Unbalanced cables or “hot” cables are susceptible to a ton of noise and interference, especially depending on factors such as cable length, heat, cold, humidity, materials, and user neglect.
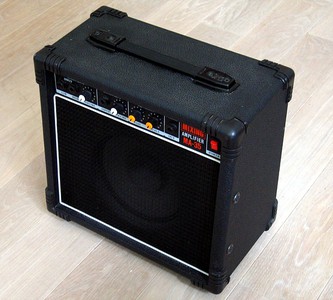
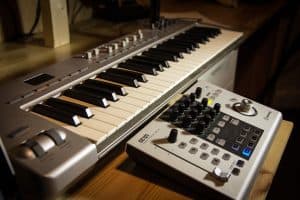
Basically, an unbalanced cable only has one wire that carries the audio signal, and due to this design, they are known to have lots of noise. These cables are used for instruments, usually such as guitars, bass guitars, keyboards, and other instruments with an output jack.
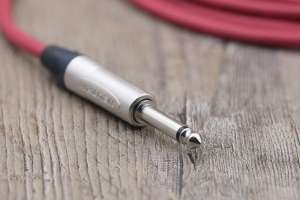
The most common types of unbalanced cables are your 1/4 inch jack cables and are termed TS (tip and sleeve) cables.
Read my article on a more in-depth overview of cables – here.
Balanced Cables
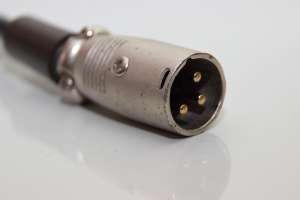
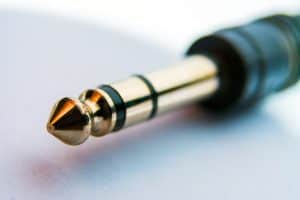
Balanced cables come in the form of XLR cables. XLR cables are designed with 2 wires that carry the audio signal. One of the signals’ polarities is reversed and then reversed again at the cable’s endpoint, effectively canceling out any noise or interference.

If you are using an XLR cable, then more likely than not, you are probably not getting interference from it. XLR cables can run up to 100 feet without any interference and up to 1000 theoretical feet without interference.
Read more on XLR cables and if they can go bad from my article – here.
Watch CSGuitars explain the difference between balanced and unbalanced cables are.
USB Cables
Lastly, USB cables could also be the cause of pops, hissing, and cracks in your studio monitors. Depending on the USB cable’s quality, you have some current could be leaking into the shield of the cable, which could cause you problems with noise.
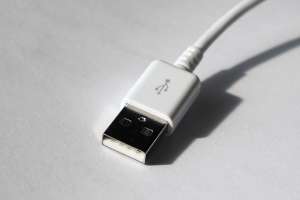
One way to remedy this is to purchase a high-quality cable and then also a ferrite noise suppressor. Another way is to create an electrical shunt (another way current can flow in a circuit to reduce its voltage).
Read more on USB cables and how they can cause interference and noise in my article – here.
(You can learn about other possible reasons that your speakers are crackling here).
House Wiring Interference
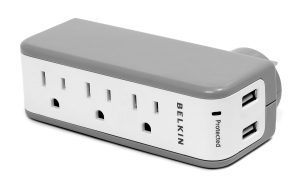
Ground Loops
A ground loop is caused when your audio equipment is plugged into various outlets in your house. If you had your PC plugged into one socket, and then your monitors plugged into another, they are joined together via your audio interface.

This essentially causes an infinite loop of electric current. This would definitely be problematic and often the most common and overlooked problem when troubleshooting noise interference.
A quick and easy way to solve this is to run all your equipment out of one electrical outlet.
Read my article on how to get rid of static interference – here.
If you think the static is coming from the recording itself, learn how to prevent it here.
Watch Stan Gibilisco go over ground loops and how to avoid them.
Other AC Devices
You have to remember that because you are plugged into your house’s electrical circuit, other AC devices if turned on, could cause massive amounts of noise interference. This could be anything from a hairdryer to a blender.
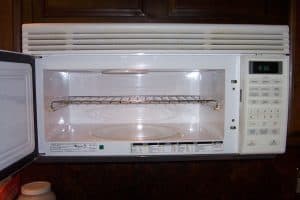
What you will need to do is make sure that all your other AC devices in your house are unplugged when you are busy in your home studio, recording, mixing, or mastering.
Computer Or Laptop Interference
Depending on what hardware you are using (this could be anything from your audio interface to the fans in your PC), you could be susceptible to a ton of interference and noise.
All the electrical components of a PC or laptop could be wreaking havoc with your monitors. Everything from the motherboard to the fans could be leaking current into cables, which is then passed along to your studio monitors.

Ways to remedy this is making sure your PC is made from a metal chassis (Faraday cage). Then make sure everything is running optimally, and no other components are running if they do not need to be (fans and ports). Try as well to have your PC or laptop as far away from your studio monitors as can be.
You would be surprised, but even cellphones could cause noise and interference in your studio monitors because of the signals and frequencies they give off.
DAW Interference
DAW interference is a possible concern, but usually, this won’t be a problem. Beginners who take up music production sometimes do not know how a DAW’s inner workings work.
You have to check that all routing from your devices is correct, and then you have to check not only the settings in your DAW but also any effects, faders, buses, and so on to check that no signals are being sent to where they shouldn’t be.
Sometimes you could have an infinite loop caused by effects sends or buses, and this could cause noise, interference, and even feedback.
Plugins Interference
Plugins could definitely be the cause of hiss, pops, and cracks in your studio monitors. VST plugins are designed to do a variety of many different things. Linking them in chains and adjusting parameters cause the effects to do different things.
Stringing and connecting various plugins in sequence and in a chain can dramatically affect your audio signal. You have to be sure that you know what the effects do and how to compensate or adjust them when used in conjunction with any other effect or plugin.
Other Audio Equipment Interference
Many other pieces of audio equipment can cause cracks, hissing, pops, and noise — everything from your audio interface to any standalone interfaces you may have.
The equipment you have may not have balanced output or inputs and this would also cause interference. How these devices are routed and configured in your general studio setup. The components and materials these pieces of equipment are made from, and then also where they draw their power from (ground loops).

There are just way too many situations and scenarios that could be applicable that could be causing your studio monitors to have noise and interference.
Just remember to have your devices plugged into the same electrical outlet, be sure that the cables and routing you have set up are correct. That is the best practice to follow when deciphering if your other audio devices are causing interference.
User Neglect
This is often overlooked and not taken seriously. User neglect can come in many forms.
Being someone who wants to start or has started a home recording studio, you have to consider that you now have many aspects of your audio setup that you have to manage and look after continuously.
You need to check that all your equipment is in tip-top condition all the time. You have to make sure your cables are correct (in terms of quality, length, and purpose), you have to make sure your software and hardware are running smoothly and optimally. You have to check that nothing is outdated and old, as well as not damaged or broken.
I would suggest making a checklist that makes sure you update and maintain all aspects of your home studio. Then what you would do is once a week, go through the checklist and mark everything off as either “good to go” or “needs to be fixed or replaced.”
We are not covering that checklist in this article; however, we cover a step-by-step checklist that will help you determine where the popping, hissing, and crackling that your studio monitors are producing is coming from.
Step-By-Step Studio Monitor Interference Checklist
Click on the below checklist to download it for free.
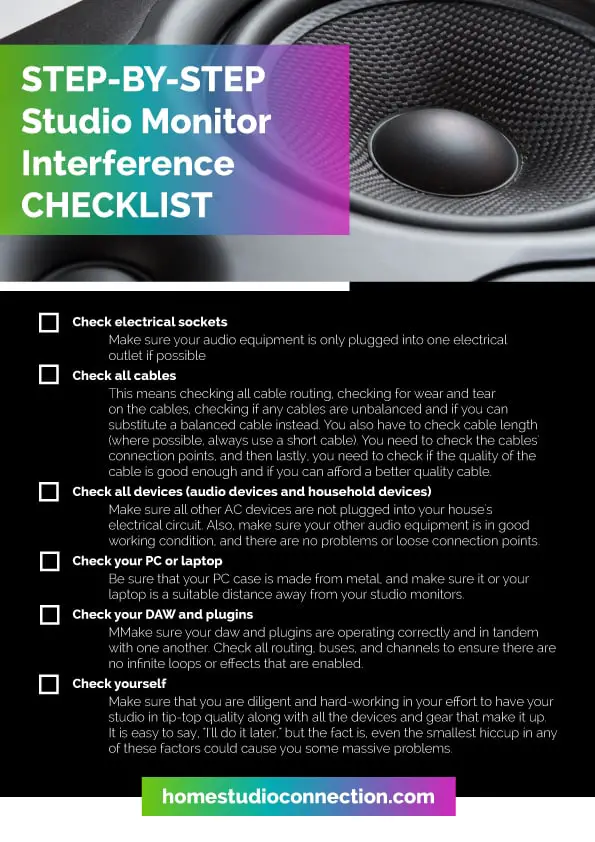
- Check electrical sockets
- Make sure your audio equipment is only plugged into one electrical outlet if possible
- Check all cables
- This means checking all cable routing, checking for wear and tear on the cables, checking if any cables are unbalanced and if you can substitute a balanced cable instead. You also have to check cable length (where possible, always use a short cable). You need to check the cables’ connection points, and then lastly, you need to check if the quality of the cable is good enough and if you can afford a better quality cable.
- Check all devices (audio devices and household devices)
- Make sure all other AC devices are not plugged into your house’s electrical circuit. Also, make sure your other audio equipment is in good working condition, and there are no problems or loose connection points.
- Check your PC or laptop.
- Be sure that your PC case is made from metal, and make sure it or your laptop is a suitable distance away from your studio monitors.
- Check your DAW and plugins.
- Make sure your daw and plugins are operating correctly and in tandem with one another. Check all routing, buses, and channels to ensure there are no infinite loops or effects that are enabled.
- Check yourself
- Make sure that you are diligent and hard-working in your effort to have your studio in tip-top quality along with all the devices and gear that make it up. It is easy to say, “I’ll do it later,” but the fact is, even the smallest hiccup in any of these factors could cause you some massive problems.
Watch Loopop go over 6 simple and cheap ways to fix noise and interference.
Conclusion
We covered 13 reasons why your studio monitors could be getting a ton of noise and interference, such as crackles, popping, and hissing. We also found out that these problems can occur even if your studio monitors are fine (such as when there is a problem with other audio devices, cables, or even user neglect).
Remember to go through the step-by-step checklist and be sure to go over everything you need to figure out what the problem is that is causing your studio to monitor a lot of noise and interference. More likely than not, if you go through the checklist, you will find the fault in no time.
If your studio monitors are too quiet, you can find out why (and how to fix it) here.
If you suspect your studio monitors are blown, you can find out how to tell for sure here.
If you want to prolong the life of your studio monitors, turn them off when not in use.