I’ve had a few XLR cables “go bad” over the years. I had even had cables that are “brand new” that I have never used, but they have been lying around for years, and subsequently, when I tried to use them, they did not work. I decided to get to the bottom of this little conundrum and determine why XLR cables can go bad.
XLR cables can go bad because the materials that make up the cables are made with intricate and fine detail, are degradable, weather with time, and are susceptible to external influences such as heat, cold, moisture, and user neglect.
This article will cover what an XLR cable is, what materials and components they are made up from, and whether those materials can be subject to deterioration. Finally, I will also give you a step-by-step tutorial on how to show you how to build or repair your very own XLR cable.
What are XLR Cables (balanced cables)
XLR cables are high-end audio cables that use a specific design of copying an audio signal and reversing the polarity of the signals to effectively cancel out any noise or interference. The design is super, and the length that an XLR cable can run is put to 100 feet without effectively having any noise or interference. Theoretically, an XLR cable could run the length of up to 1000 feet without having any notice or interference.
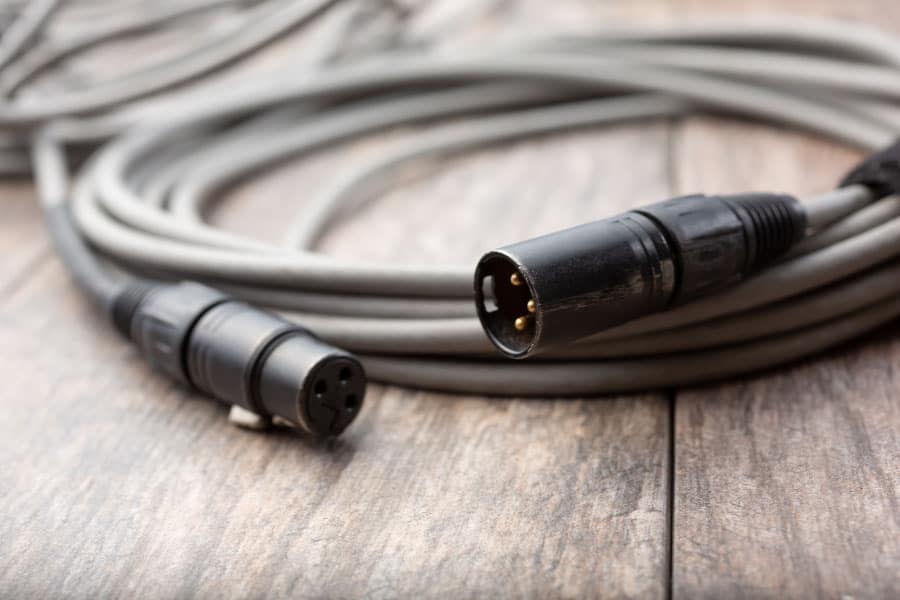
The usual telltale signs of an XLR cable is that it has 3 or more pins depending on what situation you need the XLR cable for (you can get audio and lighting XLR cables). Lighting XLR cables are called DMX cables and can have up to 7 pins.
Watch Goe Gilder explains the differences between a balanced (XLR) cable and an unbalanced cable.
Can XLR cables go bad?
Like with any audio component that you purchase, they can weather and deteriorate with time. All components that make up audio equipment (XLR cables being no different) are subject to heat, cold, humidity, interference, component durability, and a few other factors.
Let’s take a look at what XLR cables are made out of. You can then see that these parts are subject to weather, deteriorate, and malfunction due to cheap unreliable components or just because of overuse and deterioration.
What components is an XLR cable made of?
The cable
An XLR audio cable should have these components that make it up, and they are:
- The sheath
- Braid
- Cotton yarn
- Shield
- PE insulation
- Copper conductors (cores)
All these components are delicate and fine and are made with materials that can be damaged easily if not taken care of. If you twist, wrap, and roll up your cable in a manner that will twist the internal workings of an XLR cable, you may find that the internal wires could be bent or broken, and you could suffer signal loss, or the cable might not work outright.
XLR connector
The actual connector of the XLR could be misdesigned or to a degree at which the conductors do not sit tight and firmly when soldered to the terminals. A bad soldering job or terminal could deteriorate with time, and the conductors which are soldered to the terminals could give way and break.
Again, this is due to deterioration with time and the elements (perhaps your XLR cables are subject to unsatisfactory heat or cold conditions). This could also be because you do not take care of the cable and when rolling, unrolling, or connecting the XLR ends to your audio instruments or devices.
One last thing to consider is that if the XLR cable is cheap, then the connector could be made with cheaper materials such as plastic, and this material is more prone and susceptible to wear and tear than metal is.
Repairing or building your XLR cable
Whether you want to build or repair your XLR cable, you can follow this step-by-step tutorial that lays out exactly how to make your own XLR cable. If you find yourself with an XLR cable that is not working, more often than not, it will be due to the soldering of the conductors, or some aspect of the XLR connector will be faulty or broken in some way.
By following this tutorial, you will be able to determine and repair or create your own XLR cable that will be new or as good as new.
A step-by-step tutorial on making or repairing your own XLR cable
Tools you will need
- Cable cutters
- Wire strippers
- Soldering iron
- needle nose pliers
- lighter
- Utility knife
- Vice
Materials
- Cable
- Solder
- XLR Connectors
- Heat Shrink
Process of making or repairing your on XLR cable
The one main thing to note when building your XLR cable is that one positive end of the wire conductor goes to the negative end of the other side of the XLR.
Measure out your XLR cable length
Measure out your XLR cable (you can measure it in feet). Then using the cable cutters, cut your wire. Be sure to leave a few inches on the ends to have enough length for the connectors and perhaps any mistakes.
Trim and remove the outer layer (sheath of the cable)
Any and all (well usually) audio cables have a sheath around the shielding and conductors. This is the hard yet durable and malleable cover that surrounds and protects the shielding and conductors. Using the wire strippers, strip about an inch off both ends of the wire and making sure not to damage the shielding or the conductors. Twist the wires together to prevent them from fraying.
Separate each conductor and shield, and twist them
What you now need to do is separate all the conductors and shield from each other (remember some XLR cable have up to 7 pins in them. This means you could be dealing with quite a few wires when you have opened up the sheath). After separating all the wires, you need to twist the individual strands that make up the conductors and shield together.
Add the heat shrink and the connector boost
You need to cut off enough heat shrink to cover the exposed wire and enough of it, so it covers a part of the actual cable that is sheathed. This will provide protection and durability to the exposed wires. After fiddling with the heat shrink and making the wires manageable, you should add the connector boot of the XLR cable.
It should be easy to slide on, and then you can just move it down the cable to an area where it is not in the way while you are busy with the business end of the cable. Maneuver the heat shrink away from the area you are working with for now (slide it down the cable to a point).
Strip conductors
You will now use the wire strippers to remove a tiny bit of the insulation of the conductors (both the positive and negative ends). You must remove just enough so that you can use those ends for soldering the conductors to the terminals of the XLR connector. There should be no excess wire exposed. Again, twist the wires together to prevent them from fraying.
Place the wire (depending on the XLR connector you have)
Many different manufacturers make XLR connectors, which means that some of the connectors are designed in various ways. Some terminals from Neutrik’s brands allow you to place the wire in grooves, ridges, or spaces reserved for them, so you are free to solder your connections correctly.
If you have a connector that helps you with wire placement and even if you don’t, grab your vice and place the connector into it. We do this, so we can either place the wire correctly in the connector and against the terminal for soldering, or we do this so we can hold one wire in place while we solder it to the terminal.
Soldering (solder the wires to the terminals)
Using the soldering iron, place it at the point where the wire is joined to the terminal. At this point, feed solder onto that point. You have to use enough solder to completely surround the wire or fill up or cover the terminal. You need to hold the solder in place till it cools, and you can use the needle-nose pliers to achieve this (using the soldering gun will keep the solder soft). You then need to repeat this step for as many wires (conductors) that the XLR cable has.
Watch Frank Olson show you how to solder an XLR connection.
Wrap up the heat shrink
Maneuver the heat shrink back up the cable and place it over the end of the cable and over enough of the conductors to protect but not so much that the heat shrink would cause strain when it is shrunk over them.
Now take your lighter and place it over the heat shrink, being sure not to burn, break, or bend either the heat shrink or the conductors.
Assembly
Now place the plastic sleeve (most XLR connectors should come with one) around the audio cable wire and bring all the parts back up to the cable’s ends. Adjust the plastic sleeve, so it sits around the XLR connector with the terminals on it nice and snug.
Then place and adjust the metal casing (or plastic depending on the brand) over the top of the components (the terminal connector and the plastic sleeve. Be sure to adjust and make sure that all the grooves and proper parts align correctly.
Tighten and completion
Now all that is left to do is slide the boot of the XLR connector up and onto (or into depending on the brand of connector) the metal casing and tighten it. You will have to turn the boot clockwise to tighten it (remember “righty tighty, lefty loosey”). That’s it; you’re done. You now have a brand new XLR cable, or if you had some sort of an issue, hopefully, you figured out what it was and adjusted these steps accordingly.
Conclusion
In conclusion, we deduce that XLR cables can indeed go bad. This could be because of various factors, including heat, cold, moisture, time, and unsuitable cable practices (rolling and unrolling and just general maintenance of the cable).
Remember that an XLR cable is made from degradable materials and will weather with time, so be sure always to check your cables and treat them properly. If not, then be sure to reference our step-by-step guide on how to make and repair your very own XLR cable.
Read this article to find out how far you can run XLR cables without any performance problems.