You’ve written a new song and you want to record it. You’ve got a budget microphone, a guitar amp and, multitrack freeware on your desktop computer. You call your sound engineer buddy: “Line or Instrument for Vocals?” you ask him. “NEITHER!” he replies and hangs up! Be not troubled. There is a way around this vox pickle – but hold tight – this will get technical.
Line and Instrument Level audio inputs are not ideal receivers of direct audio signals from Microphones. Microphones have low signal-generating power and require a preamp to boost their audio signal for optimum vocal recording or live performances.
“Now what?” Don’t panic. Read on, studiously. There are two routes to take to get your song recorded without handing yourself over to the professionals. The first is to busk it, use what you have, with due diligence. The second is to upgrade your studio gear a notch or two without shredding your wallet. Dial your mind for some learning…
What’s the Difference Between Line and Instrument?
When speaking of ‘Line’ and ‘Instrument’, we speak of two categories of Audio Signal Level. But wait – there are two more – Mic Level and Speaker Level. These four Levels accommodate the specific electronic signal characteristics of various electronic sound sources.
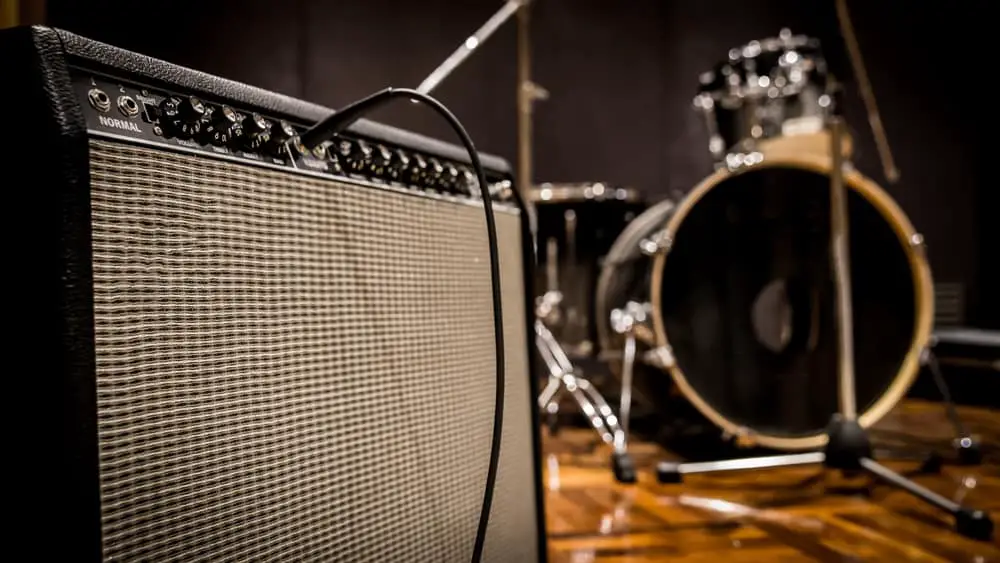
To illustrate this highly technical and rather mysterious area of audio production, let’s jump in with our hypothetical basic home recording setup of a guitar amp, microphone and a desktop computer with recording software.
The microphone (Mic Level) is a transducer of energy. It converts analog waveforms (vibrating air) to electrical power (voltage) that travels down a cable to another device, linked in series to other devices, that provide the recording device with a single type of signal Level, which is – Line Level.
Your computer soundcard needs Line Level signals coming into it to record audio effectively. A microphone has its own signal level called Mic Level, a significantly less powerful electrical signal (lower voltage) than Line Level and Instrument Level.
To bring that Mic Level signal up to Line Level for effective recording, the microphone signal needs to pass through a preamp that boosts its signal for optimal use by the recording device (in this case, your computer).
Can a Guitar Amp be used as a Mic Preamp?
‘Yes’ is the quick answer, but using a guitar amp as a mic preamp is not the ideal route to high-fidelity vocal recordings. Nonetheless, let’s make it work, however lo-fi the results.
We’re going to use the guitar amp, with its Instrument Level (Inst) input, as a preamp for your budget microphone, which has a cable with a ¼-inch jack (the same as a guitar cable) on the other end.
Although the audio characteristics of a microphone differ from those of a guitar pickup, the microphone’s low voltage poses no threat to the amp.
At the rear of the guitar amp is a Line Out port from which you can run a ¼” jack-to-minijack cable to your computer soundcard’s Line In port.
Wiring your amp and computer this way will create a compliant coupling because both the amp Line Out and computer soundcard Line In are at Line Level. This method of coupling amp and PC doesn’t however, imply a harmonious ‘marriage’ between the two (if you’ll pardon the metaphor).
And here lies the rub. You won’t get a good quality vocal recording using your guitar amp. It’s Instrument Level input is designed for a high-impedance signal from an electric guitar pickup, not a human voice coming at it through a relatively low-impedance microphone.
It’s the old ‘square peg in a round hole’ problem – not an ideal fit. But back to the science of audio…Did you ask, ‘what’s impedance?’ Don’t worry – we’re coming to that.
Remember: There are FOUR SIGNAL LEVELS, each with its own range of Voltage strength and signal characteristics.
- Mic Level has the lowest voltage (measured in millivolts), then Inst, then Line (around 1-volt), then Speaker.
- Line Level is the audio industry standard for recording and live performances.
Thus far, we’ve determined that a guitar amp does not serve as a good-quality microphone preamp. It’s time to move on – to an understanding of sustaining audio signal fidelity (integrity) and what it takes to carry a human voice from mouth to recorded hi-fidelity.
How to Achieve Hi-Fi Vocal Recordings
The word ‘impedance’ was mentioned earlier. Impedance is the resistance acting against the flow of volts in a circuit. In essence, it’s Volts vs. Ohms (in a directly proportional relationship).
The lower the voltage, the lower the impedance, the higher the fidelity of the audio signal. Good-quality microphones have low voltage and are designed with a low-impedance rating to ensure optimum signal strength/fidelity down the wire to the next device in the circuit, the mic preamp.
Why Cables Matter
To effectively sustain audio signal fidelity, studio-quality microphones also use balanced cables with XLR connectors. Unlike the budget microphone used in our example earlier, which used a single-core unbalanced cable and a ¼” jack, an XLR connector has a two-core cable with a grounding shield.
Think of the difference between a two-prong plug and a three-prong plug – the latter has a dedicated ‘earth’ wire, making the cable more stable.
Similarly, a balanced cable prevents radio-frequency interference (RFI) from external electrical devices much more effectively than an unbalanced cable.
To record clean audio tracks, free of static, hum and buzzing noises, use balanced cables with XLR connectors.
(You can learn more about how to get rid of static in your audio interface here).
Tip: You also get balanced two-core cables with ¼” jacks called TRS (Tip, Ring, Sleeve) connectors that also prevent RFI interference entering the recording process. These are useful for recording clean guitar and bass tracks.
- Balanced cables will also deliver an optimum Signal-To-Noise Ratio, which helps sustain audio signal fidelity as it travels to the recording software, aka, your Digital Audio Workstation (DAW).

Recording Vocals – What Type of Microphone is Best?
There are as many studio microphones as there are species of frogs. Okay…that’s maybe a stretch. Either way, it’s best to follow the professional choice of microphone for recording vocals in a studio – the condenser microphone.
Condenser microphones top the dynamic and ribbon types of microphones in the ‘studio go-to’ department by a hefty margin.
That’s taking the lead from the pros, but it really is all about your needs and the qualities of your voice (or those of a cohort in song). The ideal microphone for you is one that captures the character and nuances of your voice. It should also behave like a trusty tool should –reliably, ergonomically, cost-effectively and enduringly.
A condenser microphone has the necessary sensitivity to capture greater depth, color and texture from a human voice or an acoustic instrument. Condenser mics aren’t as robust as dynamic mics but, they don’t have to be if they’re only for studio applications.
A dynamic microphone is a better option if you want a single microphone to serve as both a studio and live gigging tool.
What Preamp is Best for Recording Vocals?
As with microphones, mic preamps come in many forms. Some models provide clean and ‘transparent’ amplification of Mic Level signal to Line Level. Others provide all sorts of ‘color’, ‘texture’ and ‘mood’ while executing the necessary signal boosting.
Once again, it’s all about what you desire in your vocal recording.
- If you want a clean track that you can process in the DAW, you’re best off going with a Solid-State Mic Preamp.
- If you want more character from your vocals as they arrive at the DAW (or simply out the headphones), consider a Tube Mic Preamp.
- If you’d like a bit of both, a Hybrid Mic Preamp is the route to take.
In your start-up home studio, you will need a mic preamp with built-in analogue-to-digital (A/D) converter and phantom power for your condenser mic. You’ll also need a USB connection to run the Line Level digital signal directly to your DAW.
Let’s go shopping, shall we?
Best Budget Vocal Recording Gear
- Mic: Samson CO1 – Condenser Mic – Cardioid Type
- Preamp: Scarlett Solo 3rd Gen – Mic Preamp with USB & Phantom Power (with Pro Tools DAW bundle)
You will need monitor speakers and/or headphones, if you don’t already have a set of each.
A MIDI controller is useful if you want to use virtual instruments. They cost less than $100.
Can I Get a Fully Integrated Vocal Recording Solution?
If you’re a podcaster and a musician, a ‘plug and play USB mic + preamp + cable’ integrated vocal recording solution could be your silver bullet.
Check the Blue Snowball for under $100: HERE
Conclusion
Audio recording is a complex discipline layered with rich technical detail that can fry the synaptic capacitors if you’re not careful. We’ve taken the ‘keep it simple’ route to sonic health and pro-quality vocal recordings, suitable for your home studio and your budget – under $250. We’ve also demystified some arcane audio terminology to get you to a point where you can confidently call your sound engineer buddy and inform him of your informed purchases. That’s how you roll!