Whether you’re performing or recording, getting the best sound possible from your equipment is essential. You can apply various effects, but if you do them in the wrong sequence, you can quickly end up with a garbled mess of sounds.
One of the most often-debated questions is, should you apply compression before or after reverb?
You can choose to add compression before or after reverb. Each option will create a different effect, so your choice will depend on the effect you’re trying to achieve. Adding compression after reverb will tone down your reverb and make it less pronounced; thus, this method is used less often.
Whether to add compression before or after reverb depends on various factors, like the effect you’re going for and the combinations of sounds you have. You need a thorough understanding of what each effect does to make a clear decision about which way to do it.
Let’s look at compression and reverb in detail so you can make an informed decision.
Compression First Vs. Reverb First: What’s The Difference?
The purpose of each effect will explain a lot about how to use each and the sequence in which to use them.
Compression Before Reverb
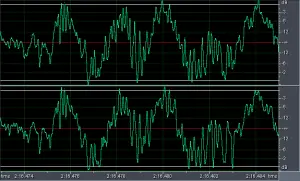
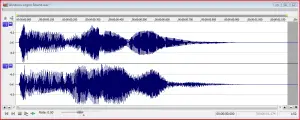
Compression is an effect that’s applied to sound to equalize it. It makes the difference between the loudest and quietest parts of the sound much smaller. If you were to look at a sound graph, the highest spikes would be much lower after running your audio through compression.
The reverb effect (often called “Room” in sound production software) refers to the effect that playing sound in a particular space or area would have (for example, in a small room or a hall).
It adds slight echoes to make the sound fuller and more rounded; you could say it adds a “less studio, more natural” feel to the audio. With this in mind, adding compression before you add reverb allows you to create a fuller, warmer feel to your audio after it’s been compressed.

The result usually sounds very natural, which makes this the preferred method for most sound engineers. The fact that only your toned-down audio will reverberate also means that there shouldn’t be any unexpected spikes in the reverb.
Your reverb will only be applied to tones that have been cleaned up, so the reverb won’t pick up any unwanted tones. More often than not, this is the safe option.
If you are unsure and don’t have time to experiment, put compression before the reverb. But there is much that can be said for doing things the other way around, too.
Reverb Before Compression
If you add reverb before compression, your reverb effect will also be compressed. This means you may lose some of the aspects that make reverb unique and natural. But the fact that the overall track will be compressed and “cleaned up” all at once is a great advantage and has its uses.
For example, the lower end of the reverb can create many deep sub-tones that can quickly clutter up your sound (known as “mud”). The higher end of reverb, especially on vocals, can also be overwhelming if it’s not applied carefully.
In those scenarios, putting your audio stream through compression after applying the reverb effect will clean those up and leave you with a “tighter” sound.
This may not be the sound that you’re going for, however. For example, think of the difference between performing live in an empty hall (reverb after) compared to a hall full of people (reverb first).
The reverb and echo you get in a crowded hall will be more natural than that in an empty hall, but if it’s an empty hall sound that you’re looking for, the crowded hall won’t be good enough.
Compression First Or Reverb First: Why Not Both?
An interesting technique that some sound engineers use makes the best of both worlds. The process involves two layers of reverb, with compression in the middle. The steps are:
- Build your entire track, including all effects you would like to add, without reverb or compression.
- Add reverb to the complete track, but not too much; about half of what you would have used to get the effect you’re looking for.
- Run the signal, with reverb, through compression. The entire signal will now be processed, including the reverb.
- Now add another reverb process to the compressed signal, again ensuring that you don’t go to the full intensity that you would have (approximately 50% to 70% of what you would have used should be sufficient).
The end result, strange as it may seem, is often much better than running reverb either before or after compression.
The dual layers of reverb with compression in the middle really make the tone much warmer, especially to make it feel as if you are playing your instruments in a room. The sound is often even described as being “intimate.”
For best results, it’s crucial to keep to the following guidelines:
- Don’t overdo either one of your two reverb layers. If you add too much reverb, it can overwhelm the entire audio clip.
- Resist the temptation to add more compression than what’s necessary. Sound engineers who use this method almost all say that they were tempted to increase the compression levels to accommodate for the added reverb, but this could easily lead to distortion in your audio.
Parallel Processing For Compression And Reverb
Another great solution is to split your audio tracks into separate channels, then apply one compression to one channel and reverb to the other.
More often than not, the instruments that require compression the most are the ones at the lower end of the spectrum, like drums and bass guitar. Sometimes a lead guitar or vocals can go very high and may also need some compression. Split these parts of the audio clip into their own channel and run it through the compressor.

The parts of an audio track that gain the most from reverb tend to be the leading instruments, like guitar, piano, and vocals. Try to. Combine them into a separate channel and run them through reverb.
Now combine the two channels back into one track, and chances are you will have achieved the perfect balance that you were looking for.
The Number One Rule Of Compression And Reverb
Music is art, and there can never be rules in art. So the number one rule is that there is no fixed rule. You may use these guidelines and work with them, but never be afraid to experiment.
At worst, you will have lost a few minutes and found a way that doesn’t work. At best, you might discover a completely unique sound that could even become your signature sound.

Test different options and combinations. Try them all and keep whatever works best for you.
Conclusion
Reverb and compression are equally important in proper music production, but only if they are used carefully. The effects can easily overpower your music, leading to distortion and other unsatisfying results.
You now have some guidelines that can help you make the best of both reverb and compression but remember always to allow yourself the time to experiment.
You can learn about audio mastering (and why it is important) here.
You can learn about spectral effects here.